Toyota CH-R Service Manual: Disassembly
DISASSEMBLY
PROCEDURE
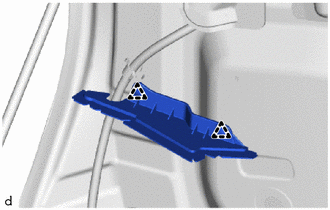
1. REMOVE HOOD SIDE PANEL LH
|
(a) Using a clip remover, disengage the clips to remove the hood side panel LH. |
|
2. REMOVE HOOD SIDE PANEL RH
HINT:
Use the same procedure as for the LH side.
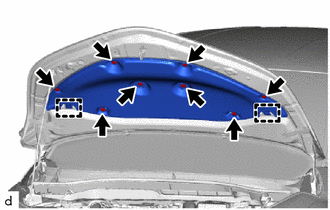
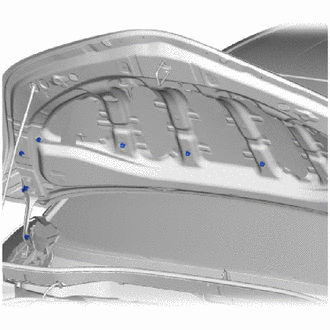
3. REMOVE HOOD INSULATOR
|
(a) Using a clip remover, remove the 8 clips. |
|
(b) Disengage the guides to remove the hood insulator.
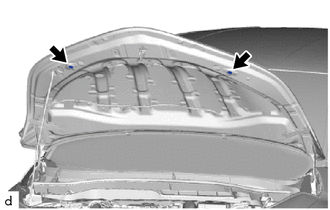
4. REMOVE HOLE PLUG
|
(a) Remove the 2 hole plugs. |
|
5. REMOVE WASHER NOZZLE SUB-ASSEMBLY
Click here
.gif)
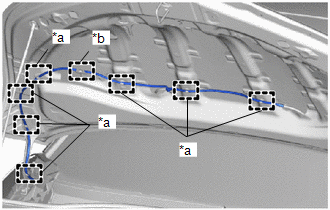
6. DISCONNECT WASHER HOSE ASSEMBLY
|
(a) Disconnect the washer hose assembly from the clamps and guide. |
|
|
(b) Remove the 7 clamps. |
|
 On-vehicle Inspection
ON-VEHICLE INSPECTION
PROCEDURE
1. INSPECT HOOD SUB-ASSEMBLY
(a) Check that the clearance measurements of areas "A" to "H" are within the
standard ranges.
Standard Clearance ...
 Adjustment
ADJUSTMENT
CAUTION / NOTICE / HINT
*a
Centering Bolt
*b
Standard Bolt
HINT:
Centering bolts are used to install the hood hinges ...
Other materials:
Toyota CH-R Service Manual > Audio And Visual System(for Radio Receiver Type): Cellular Phone Inspection
CAUTION / NOTICE / HINT
HINT:
If the operation of a cellular phone or the radio receiver assembly is requested,
make sure to follow the instructions closely and perform the operation.
PROCEDURE
1.
CHECK USAGE CONDITION
(a) Check that the vehicle and cellular ph ...
Toyota CH-R Service Manual > Navigation System: Vehicle Speed Signal Circuit between Navigation ECU and Combination Meter
DESCRIPTION
The navigation ECU receives a vehicle speed signal from the combination meter
assembly.
HINT:
A voltage of 12 V or 5 V is output from each ECU and then input to the
combination meter assembly. The signal is changed to a pulse signal at the
transistor in the combinati ...
Toyota C-HR (AX20) 2023-2026 Owner's Manual
Toyota CH-R Owners Manual
- For safety and security
- Instrument cluster
- Operation of each component
- Driving
- Interior features
- Maintenance and care
- When trouble arises
- Vehicle specifications
- For owners
Toyota CH-R Service Manual
- Introduction
- Maintenance
- Audio / Video
- Cellular Communication
- Navigation / Multi Info Display
- Park Assist / Monitoring
- Brake (front)
- Brake (rear)
- Brake Control / Dynamic Control Systems
- Brake System (other)
- Parking Brake
- Axle And Differential
- Drive Shaft / Propeller Shaft
- K114 Cvt
- 3zr-fae Battery / Charging
- Networking
- Power Distribution
- Power Assist Systems
- Steering Column
- Steering Gear / Linkage
- Alignment / Handling Diagnosis
- Front Suspension
- Rear Suspension
- Tire / Wheel
- Tire Pressure Monitoring
- Door / Hatch
- Exterior Panels / Trim
- Horn
- Lighting (ext)
- Mirror (ext)
- Window / Glass
- Wiper / Washer
- Door Lock
- Heating / Air Conditioning
- Interior Panels / Trim
- Lighting (int)
- Meter / Gauge / Display
- Mirror (int)
- Power Outlets (int)
- Pre-collision
- Seat
- Seat Belt
- Supplemental Restraint Systems
- Theft Deterrent / Keyless Entry
0.008

