Toyota CH-R Service Manual: Removal
REMOVAL
CAUTION / NOTICE / HINT
The necessary procedures (adjustment, calibration, initialization or registration) that must be performed after parts are removed and installed, or replaced during tire pressure warning valve and transmitter removal/installation are shown below.
|
Replacement Part or Procedure |
Necessary Procedures |
Effects/Inoperative when not Performed |
Link |
|---|---|---|---|
|
Replacement of tire pressure warning valve and transmitter |
|
|
|
NOTICE:
When replacing the tire pressure warning ECU and receiver, read the transmitter IDs stored in the old ECU using the Techstream and write them down before removal.
Click here
.gif)
PROCEDURE
1. REMOVE WHEEL ASSEMBLY
Click here
2. REMOVE TIRE PRESSURE WARNING VALVE AND TRANSMITTER
(a) Remove the tire valve cap.
NOTICE:
Keep the removed tire valve cap.
(b) Remove the valve core to release the air from the tire.
NOTICE:
Make sure that a sufficient amount of air has been released.
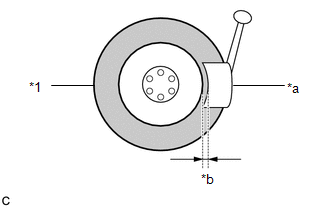
(c) Using an 11 mm deep socket wrench, remove the nut and washer.
(d) Drop the tire pressure warning valve and transmitter with grommet into the tire.
HINT:
The grommet may remain attached to the rim.
|
(e) Using a tire remover, remove the tire from the disc wheel. NOTICE:
|
|
(f) Take out the tire pressure warning valve and transmitter with grommet from the tire.
(g) Remove the grommet from the tire pressure warning valve and transmitter.
 Components
COMPONENTS
ILLUSTRATION
*1
TIRE PRESSURE WARNING VALVE AND TRANSMITTER
*2
GROMMET
*3
WASHER
*4
NUT
...
 Disposal
DISPOSAL
CAUTION / NOTICE / HINT
HINT:
The tire pressure warning valve and transmitter is powered by a lithium battery.
When disposing of the tire pressure warning valve and transmitter, remove t ...
Other materials:
Toyota CH-R Service Manual > Smart Key System(for Entry Function): All Door Entry Lock/Unlock Functions and Wireless Functions do not Operate
DESCRIPTION
If the entry lock and wireless door lock operations cannot be performed, the
electrical key and TPMS receiver assembly may be malfunctioning, or there may be
wave interference or problems in the communication which is used for the entry and
wireless function between the electrical ...
Toyota CH-R Service Manual > Instrument Panel Safety Pad: Disassembly
DISASSEMBLY
PROCEDURE
1. REMOVE NO. 1 SIDE DEFROSTER NOZZLE
(a) Disengage the claws to remove the No. 1 side defroster nozzle.
2. REMOVE NO. 2 SIDE DEFROSTER NOZZLE
(a) Disengage the claws to remove the No. 2 side defroster nozzle. ...
Toyota C-HR (AX20) 2023-2026 Owner's Manual
Toyota CH-R Owners Manual
- For safety and security
- Instrument cluster
- Operation of each component
- Driving
- Interior features
- Maintenance and care
- When trouble arises
- Vehicle specifications
- For owners
Toyota CH-R Service Manual
- Introduction
- Maintenance
- Audio / Video
- Cellular Communication
- Navigation / Multi Info Display
- Park Assist / Monitoring
- Brake (front)
- Brake (rear)
- Brake Control / Dynamic Control Systems
- Brake System (other)
- Parking Brake
- Axle And Differential
- Drive Shaft / Propeller Shaft
- K114 Cvt
- 3zr-fae Battery / Charging
- Networking
- Power Distribution
- Power Assist Systems
- Steering Column
- Steering Gear / Linkage
- Alignment / Handling Diagnosis
- Front Suspension
- Rear Suspension
- Tire / Wheel
- Tire Pressure Monitoring
- Door / Hatch
- Exterior Panels / Trim
- Horn
- Lighting (ext)
- Mirror (ext)
- Window / Glass
- Wiper / Washer
- Door Lock
- Heating / Air Conditioning
- Interior Panels / Trim
- Lighting (int)
- Meter / Gauge / Display
- Mirror (int)
- Power Outlets (int)
- Pre-collision
- Seat
- Seat Belt
- Supplemental Restraint Systems
- Theft Deterrent / Keyless Entry

0.0159