Toyota CH-R Owners Manual: Light bulbs
You may replace the following bulbs yourself. The difficulty level of replacement varies depending on the bulb. If necessary bulb replacement seems difficult to perform, contact your Toyota dealer.
For more information about replacing other light bulbs, contact your Toyota dealer.
Preparing for light bulb replacement
Check the wattage of the light bulb to be replaced.
Bulb locations
■ Front
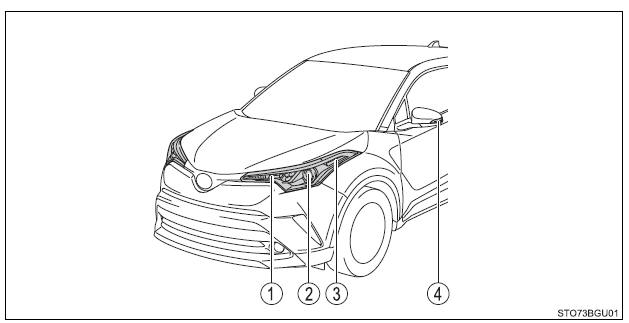
- Front turn signal lights
- Headlights
- Front side marker lights
- Side turn signal lights
■ Rear
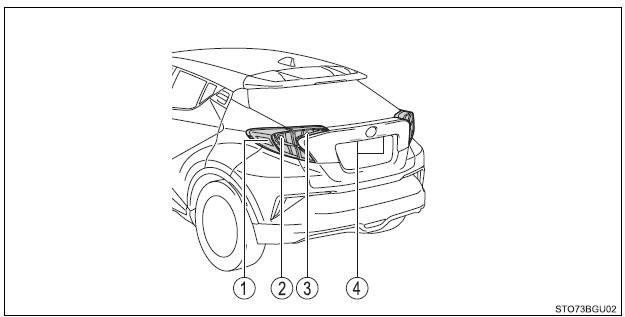
- Rear side marker lights
- Rear turn signal lights
- Back-up lights
- License plate lights
Replacing light bulbs
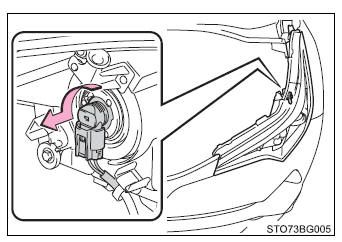
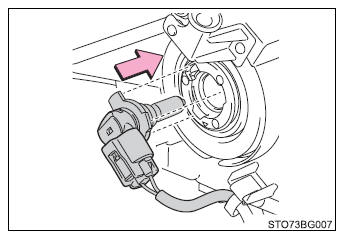
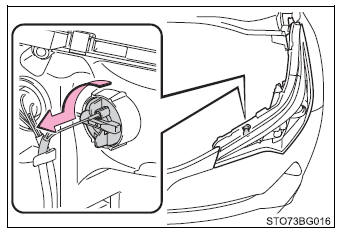
■ Headlights
1. Turn the bulb base counter-clockwise.
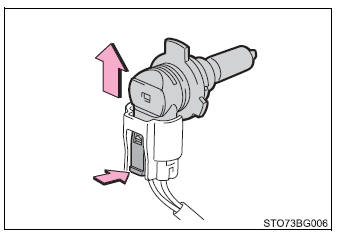
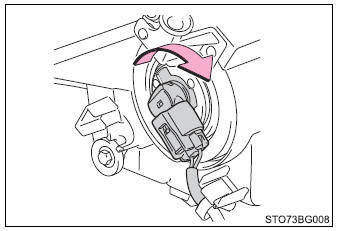
2. Unplug the connector while pressing the lock release.
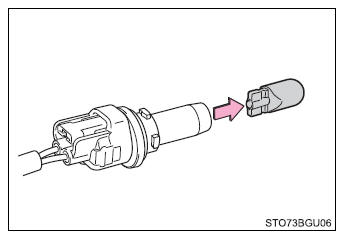
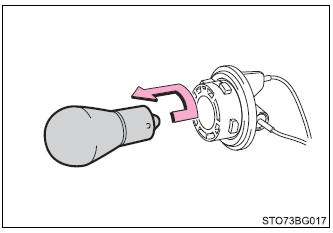
3. Replace the light bulb, and install the bulb base.
Align the 3 tabs on the light bulb with the mounting and insert.
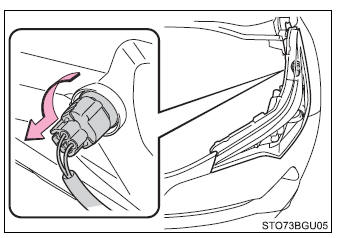
4. Turn and secure the bulb base.
Shake the bulb base gently to check that it is not loose, turn the headlights on once and visually confirm that no light is leaking through the mounting.
■ Front side marker lights
1. Turn the bulb base counter-clockwise.
2. Remove the light bulb.
3. When installing, reverse the steps listed.
■ Front turn signal lights
1. Turn the bulb base counter-clockwise.
2. Remove the light bulb.
3. When installing, reverse the steps listed.
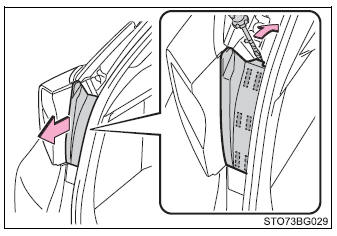
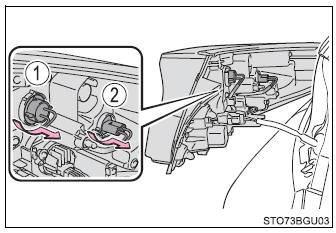
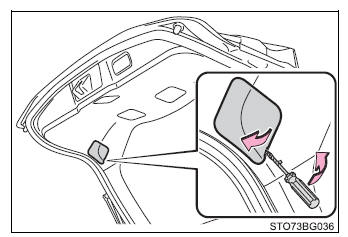
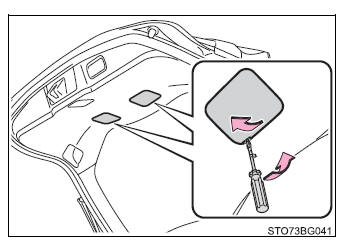
■ Rear turn signal lights and rear side marker lights
1. Open the back door and remove the cover.
To prevent damaging the vehicle, wrap the flathead screwdriver with a tape.
2. Remove the 2 screws and pull the light unit toward the rear of the vehicle to remove it.
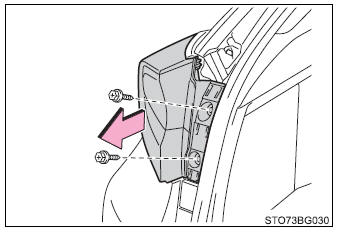
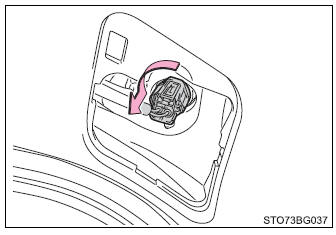
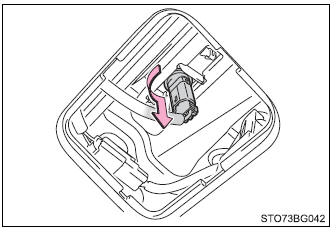
3. Turn the bulb base counter-clockwise.
- Rear turn signal lights
- Rear side marker lights
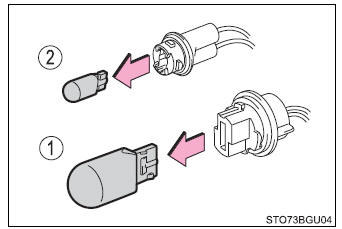
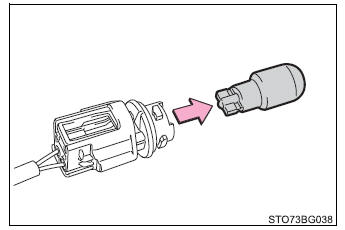
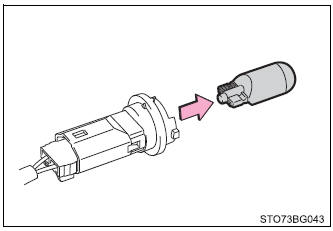
4. Remove the light bulb.
- Rear turn signal lights
- Rear side marker lights
5. When installing the light bulb, install by conducting 3 and 4 with the directions reversed.
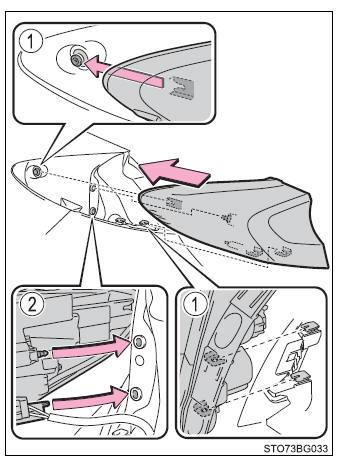
6. Install the lamp assembly.
Align the guide (1 ) and pins (2 ) on the lamp assembly with the mounting when installing it.
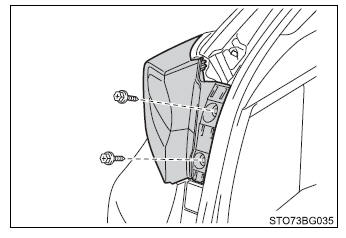
7. Install the 2 screws.
8. Install the cover.
■ Back-up lights
1. Open the back door and remove the cover.
To prevent damaging the vehicle, wrap the flathead screwdriver with a tape.
2. Turn the bulb base counter-clockwise.
3. Remove the light bulb.
4. When installing, reverse the steps listed.
■ License plate lights
1. Open the back door and remove the cover.
To prevent damaging the vehicle, wrap the flathead screwdriver with a tape.
2. Turn the bulb base counterclockwise.
3. Remove the light bulb.
4. When installing, reverse the steps listed.
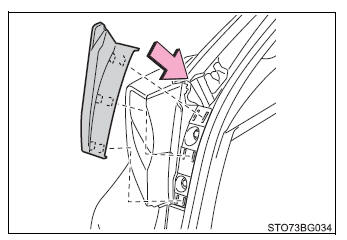
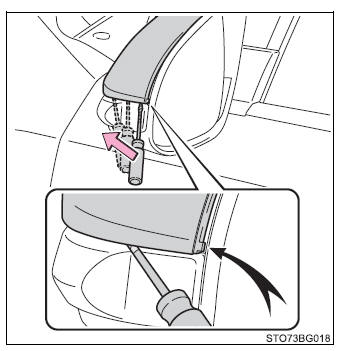
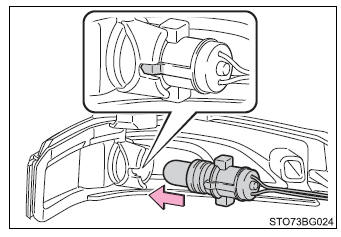
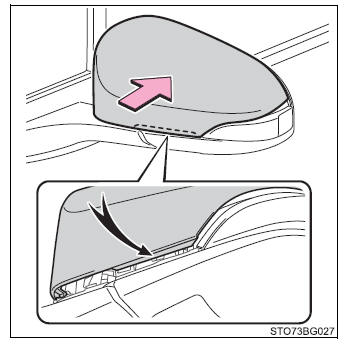
■ Side turn signal lights
1. Insert a flathead screwdriver and release the claw for the outside rear view mirror cover.
To prevent damaging the vehicle, wrap the flathead screwdriver with a tape.
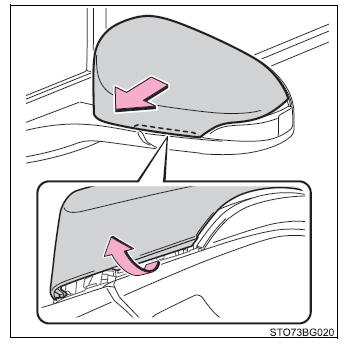
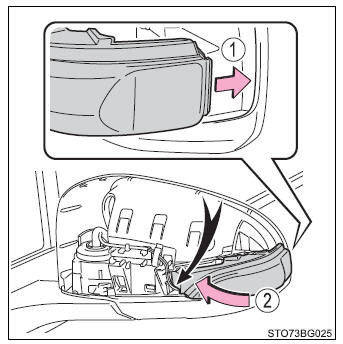
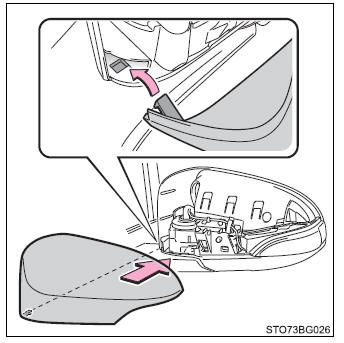
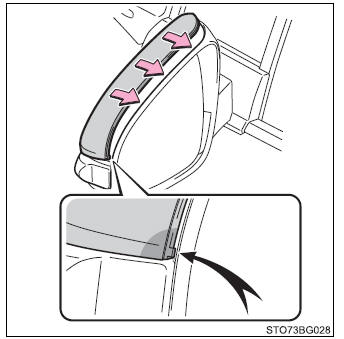
2. Release the cover claws spanning over the entire perimeter.
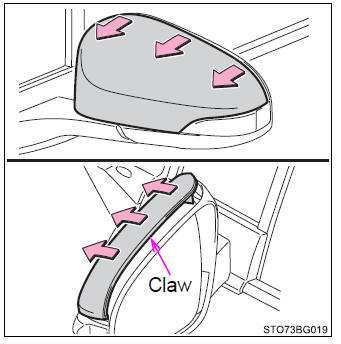
3. Release the claw of the bottom part of the cover and then remove the cover.
4. Insert a flathead screwdriver and remove the lens to the outside.
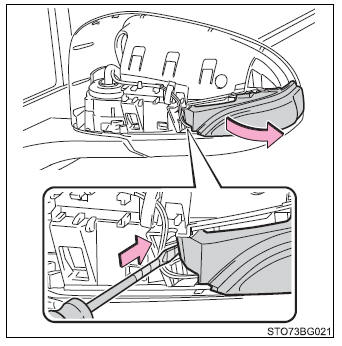
5. Remove the socket from the side turn signal light housing.
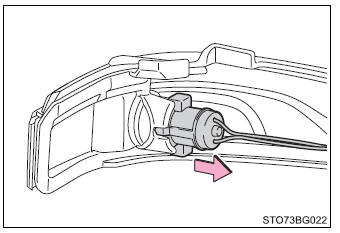
6. Remove the bulb.
7. Replace the bulb and install the socket to the side turn signal light housing.
Align the grooves of the socket to the side turn signal light housing.
8. Install the lens.
- Insert the claw of the lens.
- Attach the lens.
Arrange the wire harness on the back side of the lens.
9. Insert the claw of the cover.
10. Attach the claw on the bottom part of the cover.
11. Attach the cover claws spanning over the entire perimeter.
Finally, confirm that the outside claw is securely fitted.
■ Replacing the following bulbs If any of the lights listed below has burnt out, have it replaced by your Toyota dealer.
- Parking lights/daytime running lights
- Stop/tail lights
- High mounted stoplight
- Outer mirror illumination (if equipped)
■LED light bulbs The following lights consist of a number of LEDs. If any of the LEDs burns out, take your vehicle to your Toyota dealer to have the light replaced.
- Parking lights/daytime running lights
- Stop/tail lights
- High mounted stoplight
- Outer mirror illumination (if equipped)
■Condensation build-up on the inside of the lens Temporary condensation build-up on the inside of the headlight lens does not indicate a malfunction.
Contact your Toyota dealer for more information in the following situations:
- Large drops of water have built up on the inside of the lens.
- Water has built up inside the headlight.
■When replacing light bulbs
■Replacing light bulbs
- Turn off the lights. Do not attempt to replace the bulb immediately
after turning off the lights.
The bulbs become very hot and may cause burns.
- Do not touch the glass portion of the light bulb with bare hands. When
it is unavoidable to hold the glass portion, use and hold with a clean dry
cloth to avoid getting moisture and oils on the bulb.
Also, if the bulb is scratched or dropped, it may blow out or crack.
- Fully install light bulbs and any parts used to secure them. Failure to do so may result in heat damage, fire, or water entering the headlight unit. This may damage the headlights or cause condensation to build up on the lens.
- Do not attempt to repair or disassemble light bulbs, connectors, electric
circuits or component parts.
Doing so may result in death or serious injury due to electric shock.
■To prevent damage or fire
- Make sure bulbs are fully seated and locked.
- Check the wattage of the bulb before installing to prevent heat damage.
 Checking and replacing fuses
If any of the electrical components do not operate, a fuse may have
blown. If this happens, check and replace the fuses as necessary.
1. Turn the engine switch off.
2. Open the fuse box cover.
En ...

Other materials:
Toyota CH-R Service Manual > Black Out Tape(for Front Door): Removal
REMOVAL
CAUTION / NOTICE / HINT
The necessary procedures (adjustment, calibration, initialization or registration)
that must be performed after parts are removed and installed, or replaced during
the black out tape removal/installation are shown below.
Necessary Procedure After Parts Removed/ ...
Toyota CH-R Service Manual > Blind Spot Monitor System: Diagnosis System
DIAGNOSIS SYSTEM
DESCRIPTION
(a) Blind spot monitor data and Diagnostic Trouble Codes (DTCs) can be read from
the Data Link Connector 3 (DLC3) of the vehicle. When the system seems to be malfunctioning,
use the Techstream to check for malfunctions and to perform repairs.
CHECK DLC3
(a) Check ...
Toyota C-HR (AX20) 2023-2026 Owner's Manual
Toyota CH-R Owners Manual
- For safety and security
- Instrument cluster
- Operation of each component
- Driving
- Interior features
- Maintenance and care
- When trouble arises
- Vehicle specifications
- For owners
Toyota CH-R Service Manual
- Introduction
- Maintenance
- Audio / Video
- Cellular Communication
- Navigation / Multi Info Display
- Park Assist / Monitoring
- Brake (front)
- Brake (rear)
- Brake Control / Dynamic Control Systems
- Brake System (other)
- Parking Brake
- Axle And Differential
- Drive Shaft / Propeller Shaft
- K114 Cvt
- 3zr-fae Battery / Charging
- Networking
- Power Distribution
- Power Assist Systems
- Steering Column
- Steering Gear / Linkage
- Alignment / Handling Diagnosis
- Front Suspension
- Rear Suspension
- Tire / Wheel
- Tire Pressure Monitoring
- Door / Hatch
- Exterior Panels / Trim
- Horn
- Lighting (ext)
- Mirror (ext)
- Window / Glass
- Wiper / Washer
- Door Lock
- Heating / Air Conditioning
- Interior Panels / Trim
- Lighting (int)
- Meter / Gauge / Display
- Mirror (int)
- Power Outlets (int)
- Pre-collision
- Seat
- Seat Belt
- Supplemental Restraint Systems
- Theft Deterrent / Keyless Entry

0.008