Toyota CH-R Service Manual: Reassembly
REASSEMBLY
CAUTION / NOTICE / HINT
HINT:
- Use the same procedure for the RH side and LH side.
- The following procedure is for the LH side.
PROCEDURE
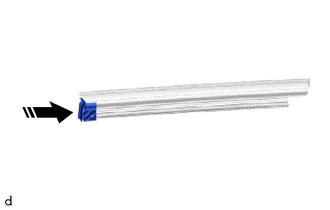
1. INSTALL REAR DOOR OUTSIDE STRIPE
Click here
.gif)
2. INSTALL REAR DOOR LOWER OUTSIDE STRIPE
Click here
3. INSTALL REAR DOOR REAR WINDOW FRAME MOULDING
Click here
4. INSTALL REAR DOOR UPPER WINDOW FRAME MOULDING
Click here
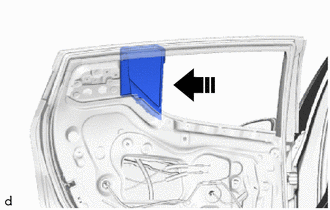
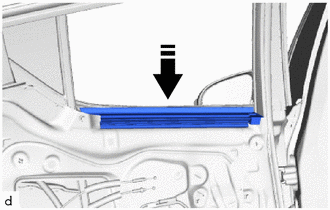
5. INSTALL REAR DOOR OUTSIDE MOULDING
Click here
6. INSTALL REAR DOOR OUTSIDE MOULDING SUB-ASSEMBLY
Click here
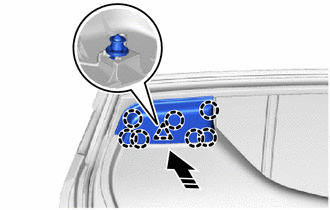
7. INSTALL REAR DOOR PANEL CUSHION
|
(a) Engage the claws to install the 2 rear door panel cushions. |
|
.png)
8. INSTALL REAR SPEAKER ASSEMBLY
Click here
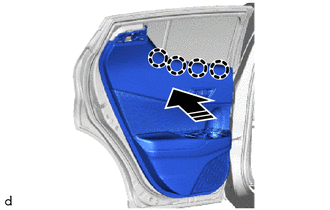
9. INSTALL REAR DOOR DUST PROOF SEAL
|
(a) Install the 3 rear door dust proof seals. |
|
.png)
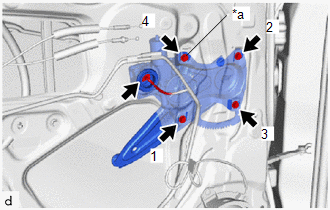
10. INSTALL REAR DOOR LOCK WITH MOTOR ASSEMBLY
Click here
11. INSTALL REAR DOOR OUTSIDE HANDLE SEAL
(a) Install 2 new rear door outside handle seals as shown in the illustration.
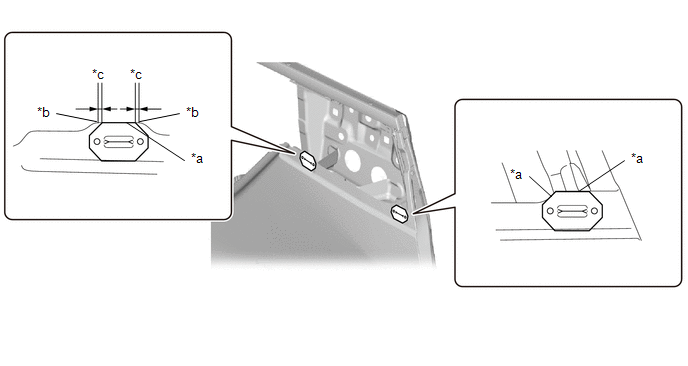
|
*a |
Rear Door Panel Edge |
*b |
R Line |
|
*c |
2.0mm |
- |
- |
12. INSTALL REAR DOOR OUTSIDE HANDLE ASSEMBLY
|
(a) Engage the guide to connect the No. 1 rear door lock remote control cable assembly. |
|
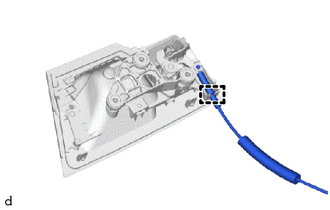
|
(b) Engage the claws to install the rear door outside handle assembly. |
|
(c) Install the 3 bolts.
Torque:
4.0 N·m {41 kgf·cm, 35 in·lbf}
|
(d) Connect the No. 1 rear door lock remote control cable assembly to the clamps. |
|
.png)
13. INSTALL REAR DOOR OUTSIDE HANDLE COVER
(a) Clean the rear door outside handle assembly surface.
(b) Remove the release paper from the face of the rear door outside handle cover.
(c) Engage the clips and guide to install a new rear door outside handle cover.
.png) |
Double-sided Tape |
(d) Press the double-sided tape area of the rear door outside handle cover.
14. INSTALL REAR DOOR BELT MOULDING ASSEMBLY
Click here
15. INSTALL REAR DOOR QUARTER WINDOW WEATHERSTRIP
|
(a) Install the rear door quarter window weatherstrip to the rear door quarter window glass. |
|
.png)
16. INSTALL REAR DOOR QUARTER WINDOW GLASS
(a) Install the rear door quarter window glass with rear door quarter window weatherstrip as shown in the illustration.
.png) |
Install in this Direction |
17. INSTALL REAR DOOR WINDOW REGULATOR ASSEMBLY
(a) Apply MP grease to the sliding parts of the rear door window regulator assembly.
|
(b) Temporarily install the temporary bolt to the rear door window regulator assembly. |
|
(c) Temporarily install the rear door window regulator assembly with the 3 bolts.
(d) Tighten the temporary bolt and 3 bolts to install the rear door window regulator assembly.
Torque:
8.0 N·m {82 kgf·cm, 71 in·lbf}
HINT:
Tighten the bolts in the order shown in the illustration.
(e) Connect the connector.
18. INSTALL REAR DOOR GLASS RUN
|
(a) Install the rear door glass run. |
|
.png)
19. INSTALL REAR DOOR FRAME GARNISH
|
(a) Engage the guides to install the rear door frame garnish. |
|
.png)
20. INSTALL REAR DOOR GLASS SUB-ASSEMBLY
(a) Insert the rear door glass sub-assembly as shown in the illustration.
NOTICE:
Do not damage the rear door glass sub-assembly.
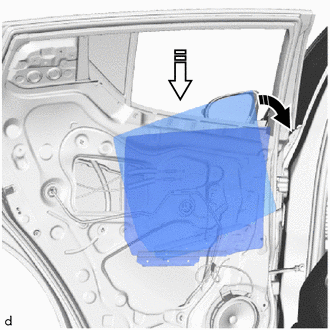
|
|
Install in this Direction (1) |
.png) |
Install in this Direction (2) |
(b) Install the rear door glass sub-assembly to the rear door window regulator assembly as shown in the illustration.
|
|
Install in this Direction |
21. INSTALL REAR DOOR WINDOW REAR LOWER FRAME SUB-ASSEMBLY
|
(a) Install the rear door window rear lower frame sub-assembly with the screw and 2 bolts. Torque: Bolt : 8.5 N·m {87 kgf·cm, 75 in·lbf} |
|
.png)
(b) Connect the rear door glass run.
22. INSTALL REAR DOOR WEATHERSTRIP
(a) Clean the rear door panel.
(b) Remove the release paper from a new rear door weatherstrip.
(c) Engage the clip (A) and other clip to install the rear door weatherstrip.
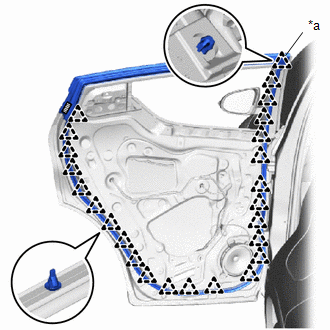
|
*a |
Clip (A) |
|
|
Double-sided Tape |
(d) Press the double-sided tape area of the rear door weatherstrip.
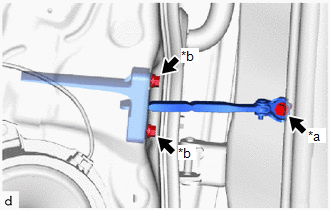
23. INSTALL REAR DOOR CHECK ASSEMBLY
(a) Apply MP grease to the sliding parts of the rear door check assembly.
(b) Clean the bolt hole in the vehicle body.
(c) Clean the threads of the bolt (A).
(d) Apply adhesive to the threads of the bolt (A).
Adhesive:
Toyota Genuine Adhesive 1324, Three Bond 1324 or equivalent
|
(e) Install the rear door check assembly with the bolt (A) and 2 bolts (B). Torque: Bolt (A) : 30 N·m {306 kgf·cm, 22 ft·lbf} Bolt (B) : 5.5 N·m {56 kgf·cm, 49 in·lbf} |
|
24. INSTALL REAR DOOR CUSHION (w/ Rear Seat Side Airbag)
|
(a) Engage the hooks to install the rear door cushion. |
|
.png)
(b) Install the 2 screws.
Torque:
8.5 N·m {87 kgf·cm, 75 in·lbf}
25. INSTALL NO. 2 SEPARATOR DOOR STIFFENER CUSHION (w/ Rear Seat Side Airbag)
(a) Clean the rear door panel.
(b) Remove the release paper from a new No. 2 separator door stiffener cushion.
(c) Engage the guides to install the No. 2 separator door stiffener cushion.
|
|
Double-sided Tape |
(d) Install the 2 bolts.
Torque:
8.5 N·m {87 kgf·cm, 75 in·lbf}
(e) Press the double-sided tape area of the No. 2 separator door stiffener cushion.
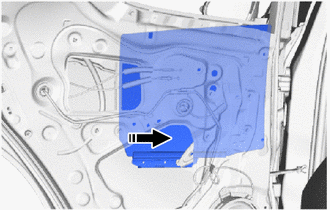
26. INSTALL REAR DOOR SERVICE HOLE COVER
(a) Apply new butyl tape to the rear door panel.
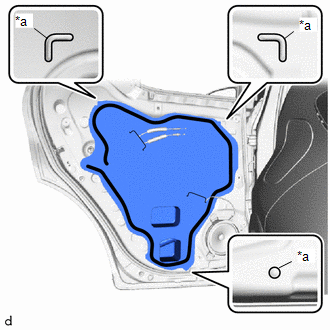
|
*a |
Reference Point |
.png) |
Butyl Tape |
(b) Pass the rear door lock remote control cable assembly and rear door inside locking cable assembly through a new rear door service hole cover.
(c) Install the front door service hole cover according to the reference points on the front door panel.
NOTICE:
Securely install the rear door service hole cover preventing wrinkles and air bubbles.
27. INSTALL REAR DOOR INSIDE PANEL REINFORCE SUB-ASSEMBLY (w/ Rear Seat Side Airbag)
|
(a) Install the rear door inside panel reinforce sub-assembly with the 4 screws. |
|
.png)
28. INSTALL REAR DOOR TRIM BRACKET
|
(a) Install the rear door trim bracket with the 2 screws. |
|
.png)
29. INSTALL NO. 2 REAR DOOR FRAME GARNISH
|
(a) Install the No. 2 rear door frame garnish. |
|
.png)
30. INSTALL HOLE PLUG
|
(a) Install the 2 hole plugs. |
|
.png)
31. INSTALL REAR DOOR BELT SEAL
(a) Install the rear door belt seal to the rear door glass inner weatherstrip as shown in the illustration.
|
|
Install in this Direction |
32. INSTALL REAR DOOR GLASS INNER WEATHERSTRIP
(a) Install the rear door glass inner weatherstrip with the rear door belt seal as shown in the illustration.
|
|
Install in this Direction |
33. INSTALL REAR DOOR BELT REAR SEAL
|
(a) Install the rear door belt rear seal. |
|
.png)
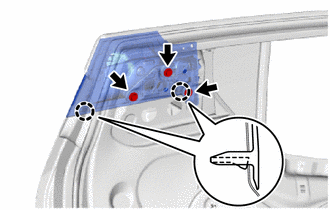
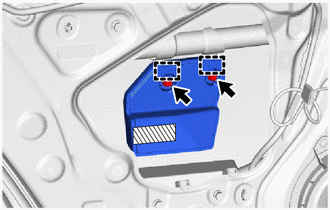
34. INSTALL REAR DOOR INSIDE HANDLE SUB-ASSEMBLY
|
(a) Engage the guides and claw to install the front door inside handle sub-assembly. |
|
.png)
35. INSTALL REAR DOOR TRIM BOARD SUB-ASSEMBLY
(a) Engage the guides to connect the rear door inside locking cable assembly and rear door lock remote control cable assembly.
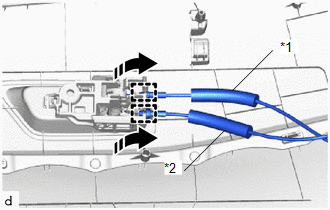
|
*1 |
Rear Door Inside Locking Cable Assembly |
|
*2 |
Rear Door Lock Remote Control Cable Assembly |
|
|
Install in this Direction |
(b) Engage the claws as shown in the illustration.
|
|
Install in this Direction |
|
(c) Engage the guide and clips to install the rear door trim board sub-assembly. |
|
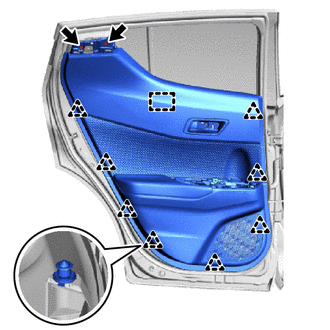
(d) Install the 2 screws.
|
(e) Install the 3 screws. |
|
.png)
36. INSTALL REAR POWER WINDOW REGULATOR SWITCH ASSEMBLY WITH REAR DOOR ARMREST BASE UPPER PANEL
|
(a) Connect the connector. |
|
(b) Engage the guides, clips and claws to install the rear power window regulator switch assembly with rear door armrest base upper panel as shown in the illustration.
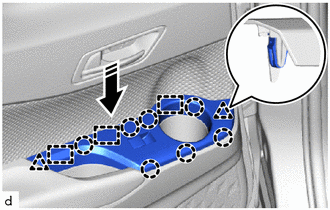
|
|
Install in this Direction |
37. INSTALL REAR DOOR INSIDE HANDLE BEZEL PLUG
(a) Engage the claws to install the rear door inside handle bezel plug as shown in the illustration.
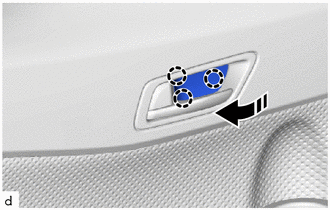
|
|
Install in this Direction |
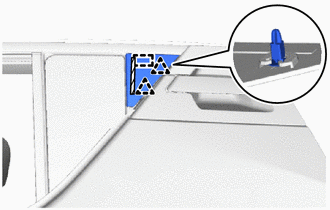
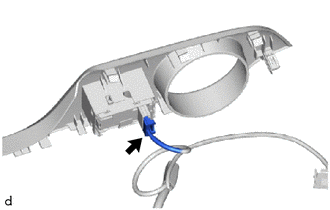
38. INSTALL REAR DOOR REAR FRAME BRACKET
(a) Engage the claws and clip to install the rear door rear frame bracket as shown in the illustration.
|
|
Install in this Direction |
39. CONNECT CABLE TO NEGATIVE BATTERY TERMINAL
Click here
NOTICE:
When disconnecting the cable, some systems need to be initialized after the cable is reconnected.
Click here
40. INITIALIZE POWER WINDOW CONTROL SYSTEM
Click here
41. INSPECT POWER WINDOW OPERATION
Click here
 Adjustment
ADJUSTMENT
CAUTION / NOTICE / HINT
*a
Centering Bolt
*b
Standard Bolt
HINT:
Use the same procedure for the RH side and LH side. ...
 Rear Door Opening Trim Weatherstrip
Components
COMPONENTS
ILLUSTRATION
*A
w/o Rear Seat Side Airbag
*B
w/ Rear Seat Side Airbag
*1
REAR DOOR OPENING TRIM WEA ...
Other materials:
Toyota CH-R Service Manual > Airbag System: Center Airbag Sensor Assembly Malfunction (B1000/31)
DESCRIPTION
The airbag sensor assembly consists of the acceleration sensor, safing sensor,
drive circuit, diagnosis circuit, ignition control, etc.
If the airbag sensor assembly receives signals from the acceleration sensor and
pressure sensor, it determines whether the airbags and pretensione ...
Toyota CH-R Owners Manual > For safe use: Exhaust gas precautions
Harmful substance to the human body is included in exhaust gases
if inhaled.
WARNING Exhaust gases include harmful carbon monoxide (CO),
which is colorless and odorless. Observe the following precautions.Failure
to do so may cause exhaust gases enter the vehicle and may lead to an accide ...
Toyota C-HR (AX20) 2023-2026 Owner's Manual
Toyota CH-R Owners Manual
- For safety and security
- Instrument cluster
- Operation of each component
- Driving
- Interior features
- Maintenance and care
- When trouble arises
- Vehicle specifications
- For owners
Toyota CH-R Service Manual
- Introduction
- Maintenance
- Audio / Video
- Cellular Communication
- Navigation / Multi Info Display
- Park Assist / Monitoring
- Brake (front)
- Brake (rear)
- Brake Control / Dynamic Control Systems
- Brake System (other)
- Parking Brake
- Axle And Differential
- Drive Shaft / Propeller Shaft
- K114 Cvt
- 3zr-fae Battery / Charging
- Networking
- Power Distribution
- Power Assist Systems
- Steering Column
- Steering Gear / Linkage
- Alignment / Handling Diagnosis
- Front Suspension
- Rear Suspension
- Tire / Wheel
- Tire Pressure Monitoring
- Door / Hatch
- Exterior Panels / Trim
- Horn
- Lighting (ext)
- Mirror (ext)
- Window / Glass
- Wiper / Washer
- Door Lock
- Heating / Air Conditioning
- Interior Panels / Trim
- Lighting (int)
- Meter / Gauge / Display
- Mirror (int)
- Power Outlets (int)
- Pre-collision
- Seat
- Seat Belt
- Supplemental Restraint Systems
- Theft Deterrent / Keyless Entry

0.0095