
Toyota CH-R Service Manual: Components
COMPONENTS
ILLUSTRATION
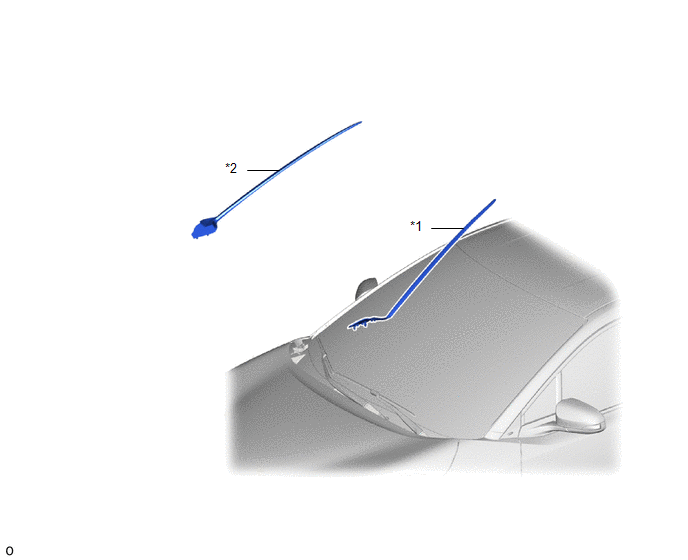
|
*1 |
WINDSHIELD OUTSIDE MOULDING LH |
*2 |
WINDSHIELD OUTSIDE MOULDING RH |
ILLUSTRATION
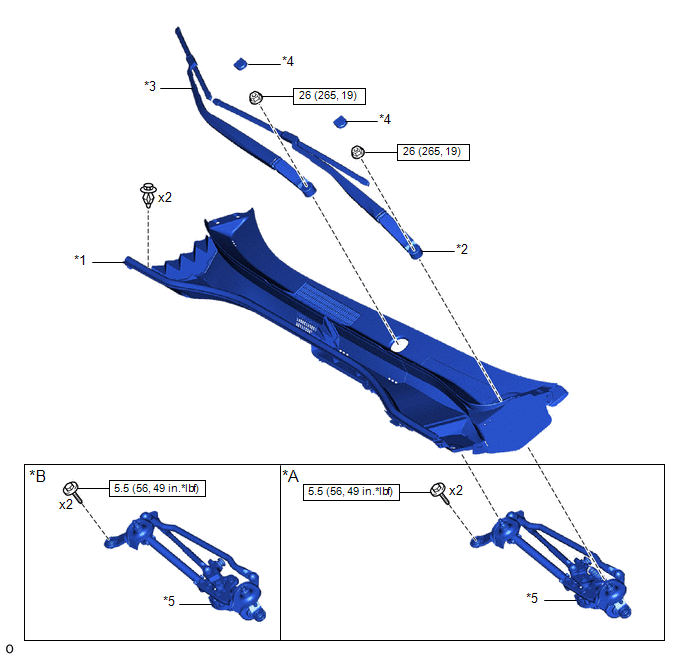
|
*A |
for USA and Canada |
*B |
except USA and Canada |
|
*1 |
COWL TOP VENTILATOR LOUVER SUB-ASSEMBLY |
*2 |
FRONT WIPER ARM AND BLADE ASSEMBLY LH |
|
*3 |
FRONT WIPER ARM AND BLADE ASSEMBLY RH |
*4 |
FRONT WIPER ARM HEAD CAP |
|
*5 |
WINDSHIELD WIPER MOTOR AND LINK ASSEMBLY |
- |
- |
.png) |
N*m (kgf*cm, ft.*lbf): Specified torque |
- |
- |
ILLUSTRATION
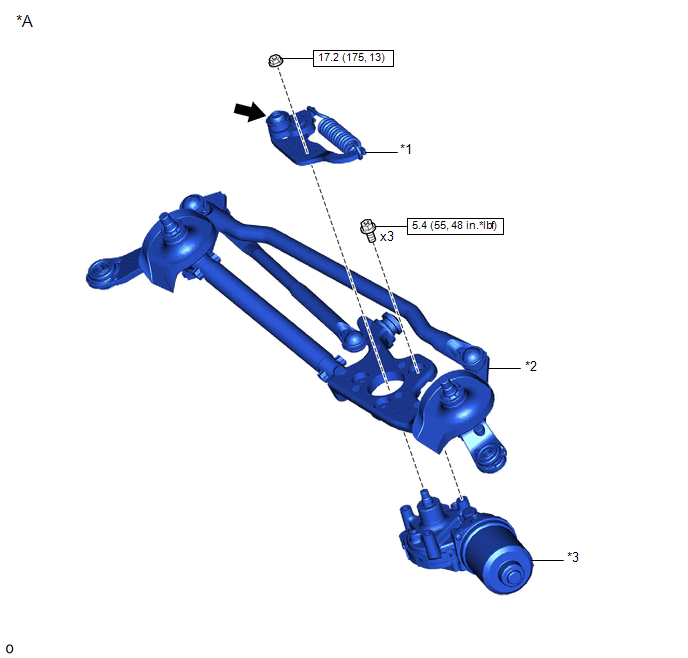
|
*A |
for USA and Canada |
- |
- |
|
*1 |
FRONT WIPER CRANK SUB-ASSEMBLY |
*2 |
WINDSHIELD WIPER MOTOR AND LINK ASSEMBLY |
|
*3 |
WINDSHIELD WIPER MOTOR ASSEMBLY |
- |
- |
|
|
N*m (kgf*cm, ft.*lbf): Specified torque |
.png) |
MP grease |
ILLUSTRATION
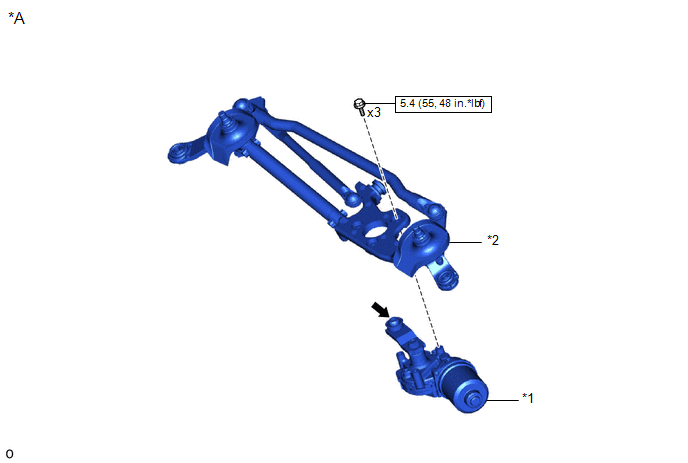
|
*A |
except USA and Canada |
- |
- |
|
*1 |
WINDSHIELD WIPER MOTOR ASSEMBLY |
*2 |
WINDSHIELD WIPER LINK ASSEMBLY |
|
|
N*m (kgf*cm, ft.*lbf): Specified torque |
|
MP grease |

 On-vehicle Inspection
ON-VEHICLE INSPECTION
PROCEDURE
1. INSPECT WINDSHIELD WIPER MOTOR ASSEMBLY
(a) for LH Side:
(1) Operate the windshield wiper motor assembly.
...
Other materials:
Toyota CH-R Service Manual > Radio Antenna Cord: Installation
INSTALLATION
PROCEDURE
1. INSTALL NO. 3 ANTENNA CORD SUB-ASSEMBLY
(a) w/o Manual (SOS) Switch
(1) Engage the clamp and guide to temporarily install the No. 3 antenna
cord sub-assembly.
*A
...
Toyota CH-R Service Manual > Rear Door: Disassembly
DISASSEMBLY
CAUTION / NOTICE / HINT
The necessary procedures (adjustment, calibration, initialization or registration)
that must be performed after parts are removed and installed, or replaced during
the rear door removal/installation are shown below.
Necessary Procedures After Parts Removed/ ...
Toyota C-HR (AX20) 2023-2026 Owner's Manual
Toyota CH-R Owners Manual
- For safety and security
- Instrument cluster
- Operation of each component
- Driving
- Interior features
- Maintenance and care
- When trouble arises
- Vehicle specifications
- For owners
Toyota CH-R Service Manual
- Introduction
- Maintenance
- Audio / Video
- Cellular Communication
- Navigation / Multi Info Display
- Park Assist / Monitoring
- Brake (front)
- Brake (rear)
- Brake Control / Dynamic Control Systems
- Brake System (other)
- Parking Brake
- Axle And Differential
- Drive Shaft / Propeller Shaft
- K114 Cvt
- 3zr-fae Battery / Charging
- Networking
- Power Distribution
- Power Assist Systems
- Steering Column
- Steering Gear / Linkage
- Alignment / Handling Diagnosis
- Front Suspension
- Rear Suspension
- Tire / Wheel
- Tire Pressure Monitoring
- Door / Hatch
- Exterior Panels / Trim
- Horn
- Lighting (ext)
- Mirror (ext)
- Window / Glass
- Wiper / Washer
- Door Lock
- Heating / Air Conditioning
- Interior Panels / Trim
- Lighting (int)
- Meter / Gauge / Display
- Mirror (int)
- Power Outlets (int)
- Pre-collision
- Seat
- Seat Belt
- Supplemental Restraint Systems
- Theft Deterrent / Keyless Entry

0.0087